It’s always nice to have a blog to capture what you’ve done over time. After researching around I eventually went with Google Cloud WordPress Click to Deploy for my blog website because Google offers $300 free trial and it is fairly easy to setup. I also need to secure my website with SSL/HTTPS so I went with Let’s Encrypt as it is free. To make sure that I don’t need to manually renew certificates (the virtue of being lazy 😉 ), I also set up a cron job to renew certificates automatically. Let’s see how all these were set up!
Create WordPress on Google Cloud Platform
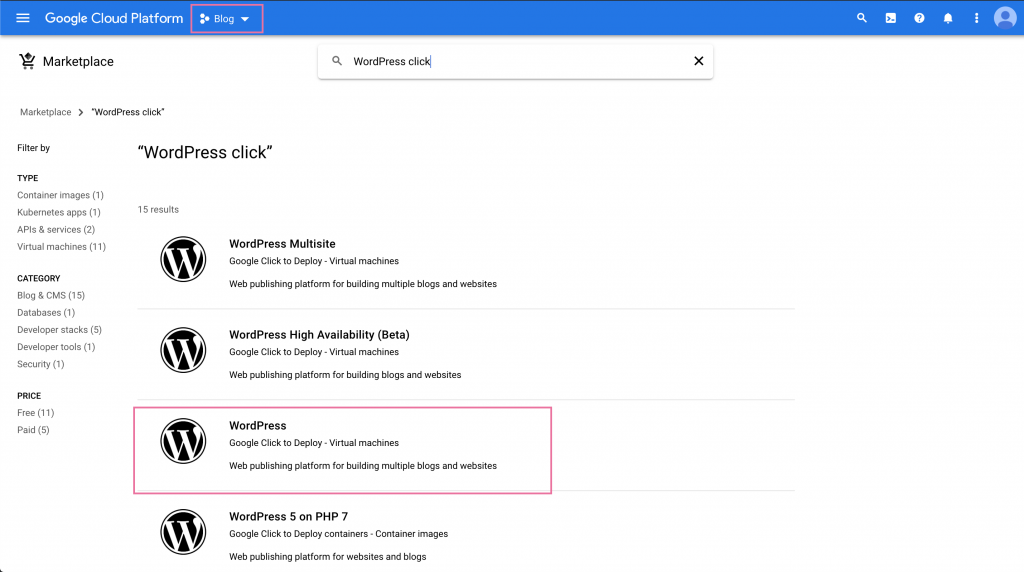
The first step would be creating the site on Google Cloud. Once you’ve signed up for Google Cloud, go to Google Cloud Console and create a new project from Manage Resources page. After project creation, click on Marketplace and search for WordPress.
Select highlighted item and click LAUNCH button. That will open the following page. Select the zone and machine type (If you want to use Free Tier, select micro). Enter Administrator e-mail address. On Firewall section, check both allow HTTP and HTTPS traffic.
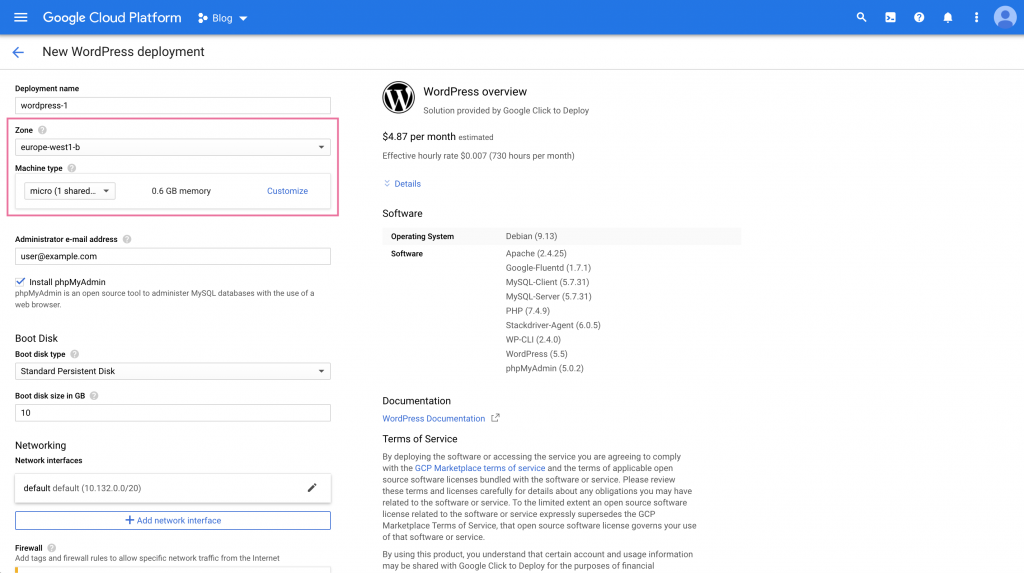
Scroll down and click Deploy.
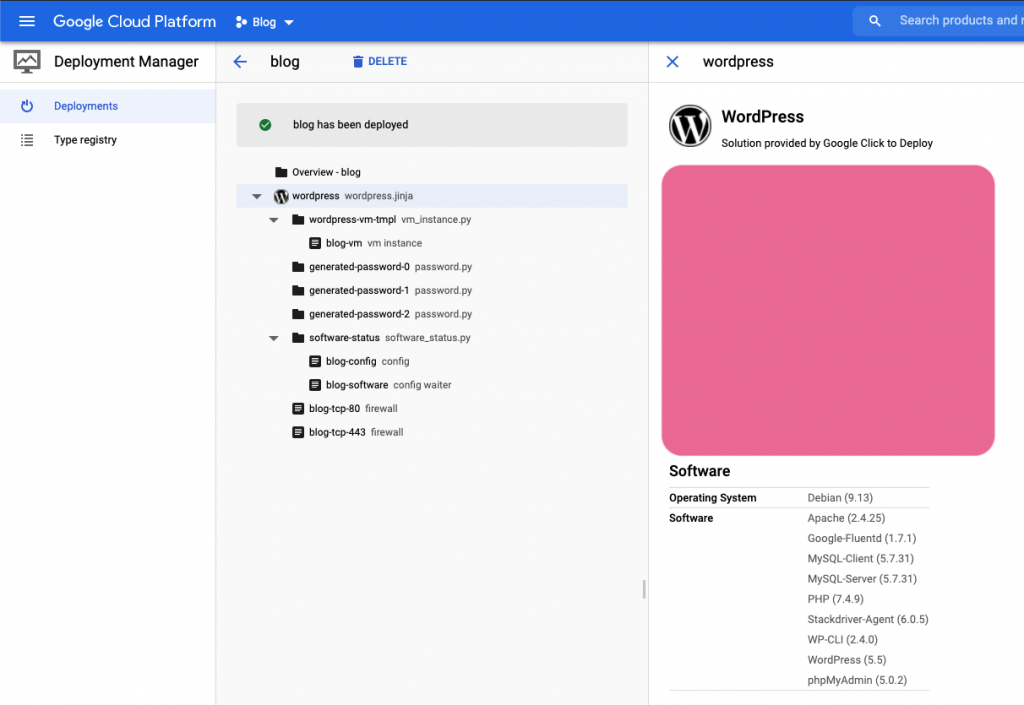
Open the site address and you should be able to see your website running. 🚀
Update Domain Details
Once you have the website running, the next step is to update your domain DNS settings with IP address shown on site address. Most domain registry service would allow you to manage DNS distribution. I used Namecheap and this is what it looks like.
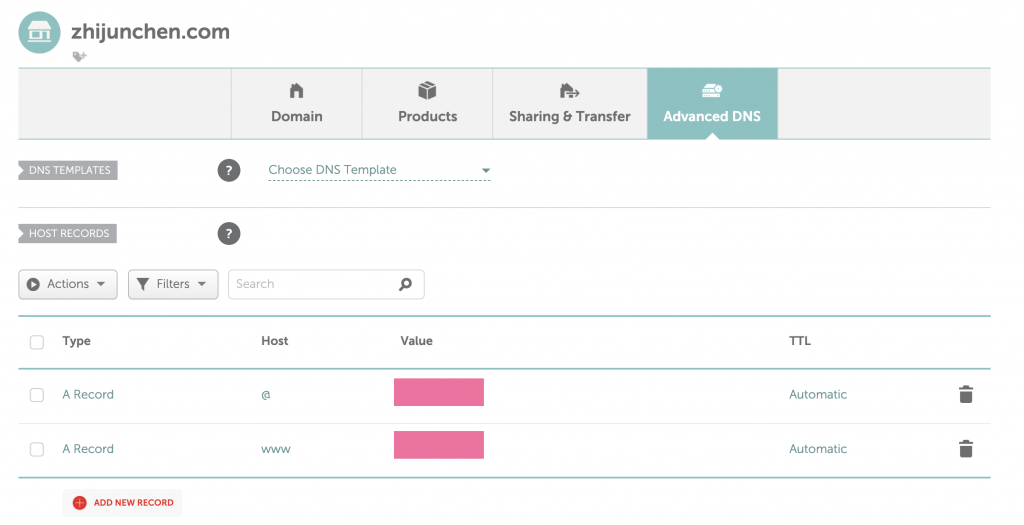
You need to create two A Records with @ and www and point them to your IP address from Google Cloud Platform.
After domain is propagated (Check with DNSChecker), you should be able to view your website with domain name.
Update WordPress Address
Once domain is propagated, you need to update it in WordPress.
Go to Settings -> General, and update WordPress Address and Site Address with http://<youdomainname>.
After this is updated, you will need to re-login again.
Configure Let’s Encrypt SSL Certificate
Up to this point your website is up and running, but if you visit your site you will notice a warning on the address bar saying that your site is insecure. The next step would be adding SSL certificate to your website. We will use Let’s Encrypt and Certbot for this.
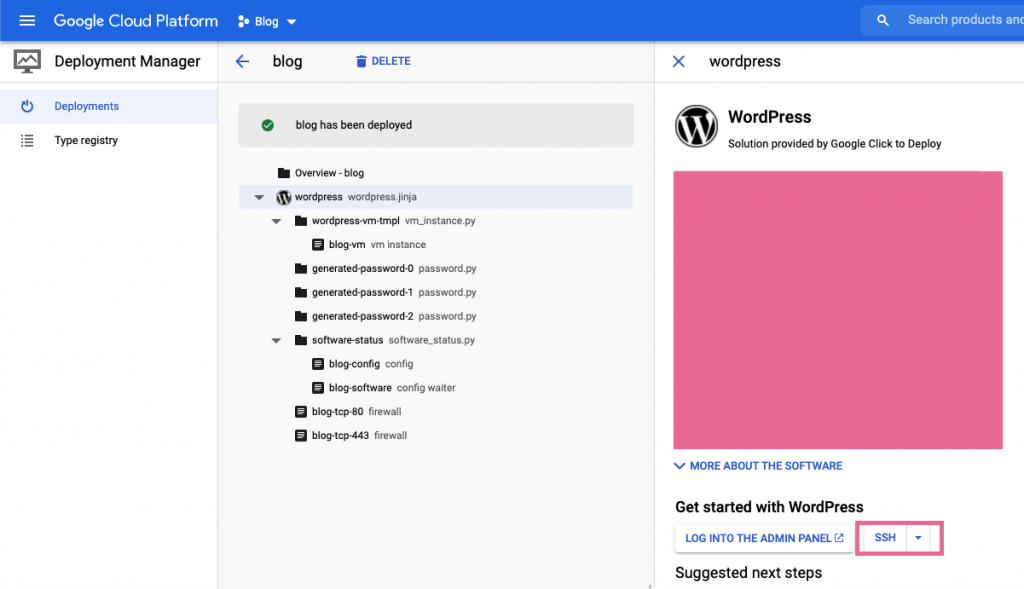
First of all go to Deployment Manager and click on SSH to launch terminal.
This will open a terminal in a new window. Then run the following command to install certbot (Make sure you are under Debian system).
sudo apt-get install certbot python-certbot-apache -t stretch-backportsAfter all packages are installed, run the following command, which should guide you through certificate generation
sudo certbot --apache- Enter email address
- Agree to Terms of Service
- Select whether you want to share your email address, I chose No
- For inputting the domain names: Type in both your @ and www addresses. In my case they are zhijunchen.com and www.zhijunchen.com
- Enter 2 for virtual host selection, the one with your domain name and HTTPS.
- Select Redirect to make all HTTP request directed to HTTPS.
After everything is set up, you need to run the following command to restart Apache server for certificate changes to take effect.
sudo service apache2 restartNot navigate to https://yourdomainname and you should see the padlock indicating your website is secure.
Update WordPress Address with HTTPS
You will need to update WordPress address again with https protocol.
SSL Certificates Auto-Renewal
By default the certificate will last for about 3 months and you will need to renew it once expired. You can set this up automatically using the following command:
sudo crontab -eIf you are asked for editor choice, select VIM Basic.
This will open your cron jobs and you will add the following line to the document.
0 */12 * * * certbot -q renew --apacheThis will run the renew process twice daily and auto renewing certificates if expired.
Hope you enjoy this! 😄